First time using Eco-Visio? Then this guide is for you!
Before we begin
Make sure that:
- Your counter has been successfully installed and you know its exact location and attachment date.
- For counters with direction detection: You have identified which directions correspond to the IN and OUT directions (e.g. Southbound/Northbound; Towards the City; Towards the Main street; etc.)
- For counters with
-
- – Automatic data transmission: you have successfully run a modem test using Eco-Link, Eco-Link Evo, or Eco-Link PC.
- – Manual data retrieval: you have connected to your counter and retrieved the data to Eco-Visio using Eco-Link or Eco-Link Evo software.
-
- You have taken pictures of the counter and its surroundings for future reference.
Step 1: Confirm your e-mail address
After purchasing your counter, you will receive generic Eco-Visio credentials. Use them for your first-time login.
You could also ask your local Eco-Visio admin to create an account for you. In both cases you will be prompted to confirm your email address.
Once you receive the confirmation email, click on Activate My Account:

To complete activation of your profile, you will be prompted to create a new password:

Now you are ready to start exploring Eco-Visio!
Step 2: Attach your counter to a counting site
Firstly, it’s essential to distinguish between the physical counter and the virtual counting site in Eco-Visio.
In Eco-Visio, the counter is represented by its serial number, while the counting site has attributes like a name that you give, coordinates, an image, etc. Note that while counters can be moved around, counting sites retain the associate data.
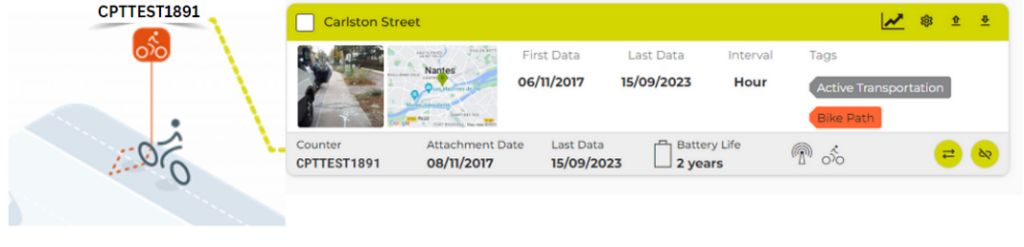
*Note: Several counters can be attached to the same counting site. Think of a street with unidirectional bike lanes on each side of the street. Adding both counters to the same site will allow us to better understand data at the street level, instead of analyzing each bike lane separately.
It is now time to attach your counter to your first counting site!
- Navigate to ‘Sites’
- Find the counter by its serial number under “Non – Attached Counters” and choose to attach it to a new site.
- Start filling out the basic information you know about the counter. Click on Next to move through the process:
- Name
- Description
- Tags
a few predefined tags are already available in the dropdown. Feel free to create your own. Tags are here to help you group your sites and are very helpful once you have 10+ counters.
- Exact GPS location
Zoom in all the way in to place the counter on the correct side of the street.
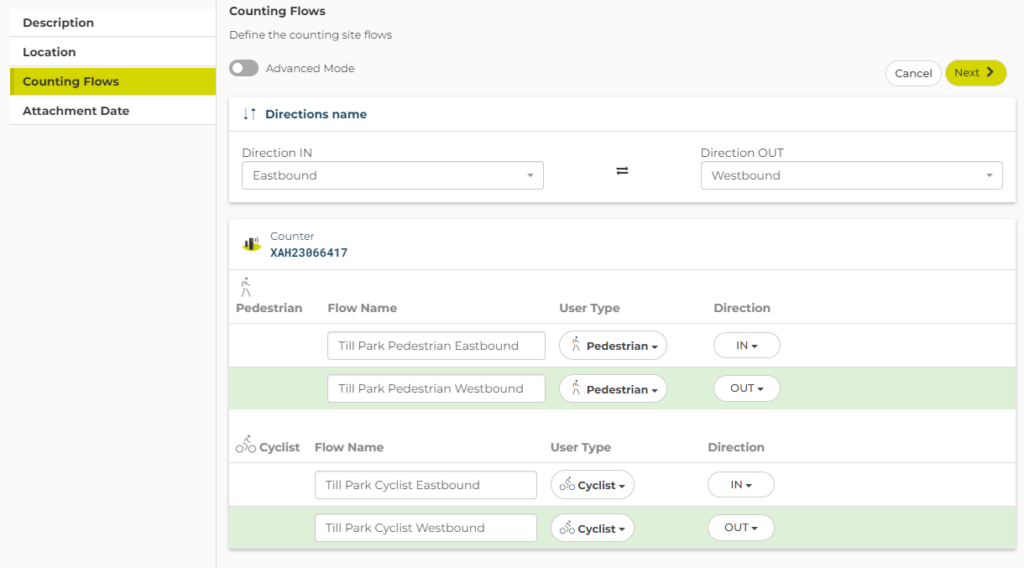
- Counting flows
IN and OUT direction identifiers for your counter. A non directional counter will only have one flow, while a multi (cyclists and pedestrians) counter with direction detection will have four flows: Pedestrians IN, Pedestrians OUT, Bikes IN, Bikes OUT.
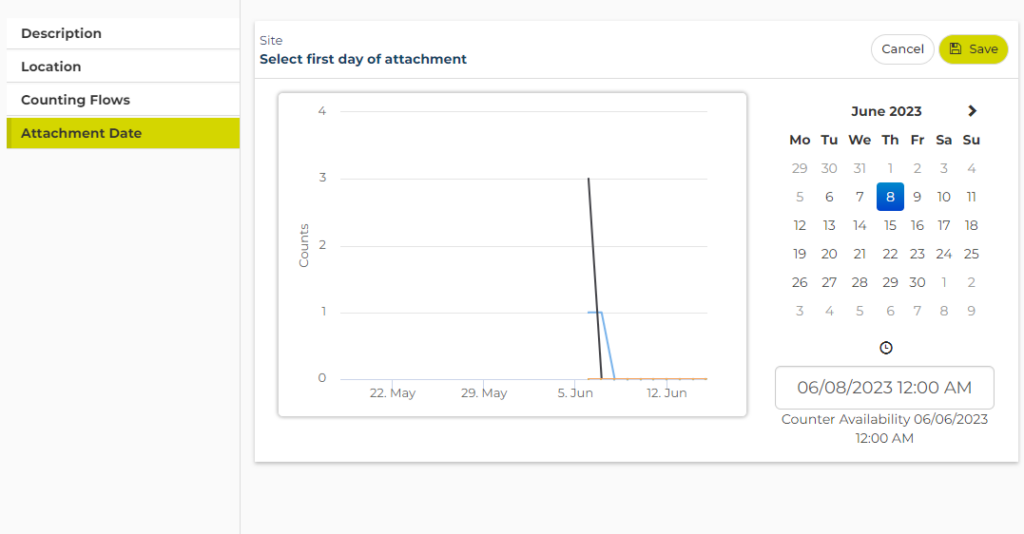
- Attachment Date
It is important to choose the next day after the counter was installed, to start from the blank page. This way we exclude partial day counts and a common installation spike in counts, because of all the testing and movements in front of the counter.
- Once the site is created, you can now view and add further details, such as
- Pictures –> to help find the counter in the everchanging environment.
- Attachments –> e.g. maintenance reports done by your contractor or our technical team.
- Site History –> what counters were attached during what periods.
- Equipment
shows how much battery life remains in the counter that is currently attached to the site. It is very important to add this information manually, so you know when the battery replacement is due as well as our team has access to the up-to-date information for any maintenance and troubleshooting needs.
Your counting site is now created!
*Note: If you have several counters to attach, please follow the correct scenario
| Scenario 1
The counters are installed on different sites |
Scenario 2
The counters are installed on the same site |
| Follow the same steps as above, creating one counting site per counter. | Instead of attaching the counter to a new site, click on “Attach to an existing site”. |
Step 3: Have a look at your Data
Click on Analysis to open the Data Analysis page.
Choose your Period -> The Name of the Site -> Type of Analysis you would like to run and voilà , here is your first data visualization!
P.S.
* We do our best to give you as much flexibility as possible, so you can update and complete the information about your Site at any time by clicking on the Edit buttons.
* Did you know that a site can be created during the installation? You just need to have Eco-Link Evo on your phone and our Wizard will walk you through all the steps to fill out the necessary information.
* Plan on doing a count validation 2-3 months after the installation! This is a go-to method to ensure accuracy of your counts.
* If you are wondering how to detach a counter from a counting site, this is something that is only relevant for mobile counters (which you will be moving around with time). we have a very handy and detailed article on mobile counter management. Read on!